You can bring your own language model (LLM) for each of your active license keys. Reasons for this include security, compliance, or because you have trained/refined your own models to suit your needs. By enabling the Bring Your Own LLM (BYO LLM) feature, the chatPowerBI visual will call your LLM to generate responses.

Step 1) Access the user panel.
Step 2) In the "Features" section, go to the "BYO LLM" subsection, where you will see all active license keys and the status of the BYO LLM feature.
Step 3) To activate the feature for a specific key, click the pencil icon.
Step 4) In the window that opens, toggle the switch to enable the feature.
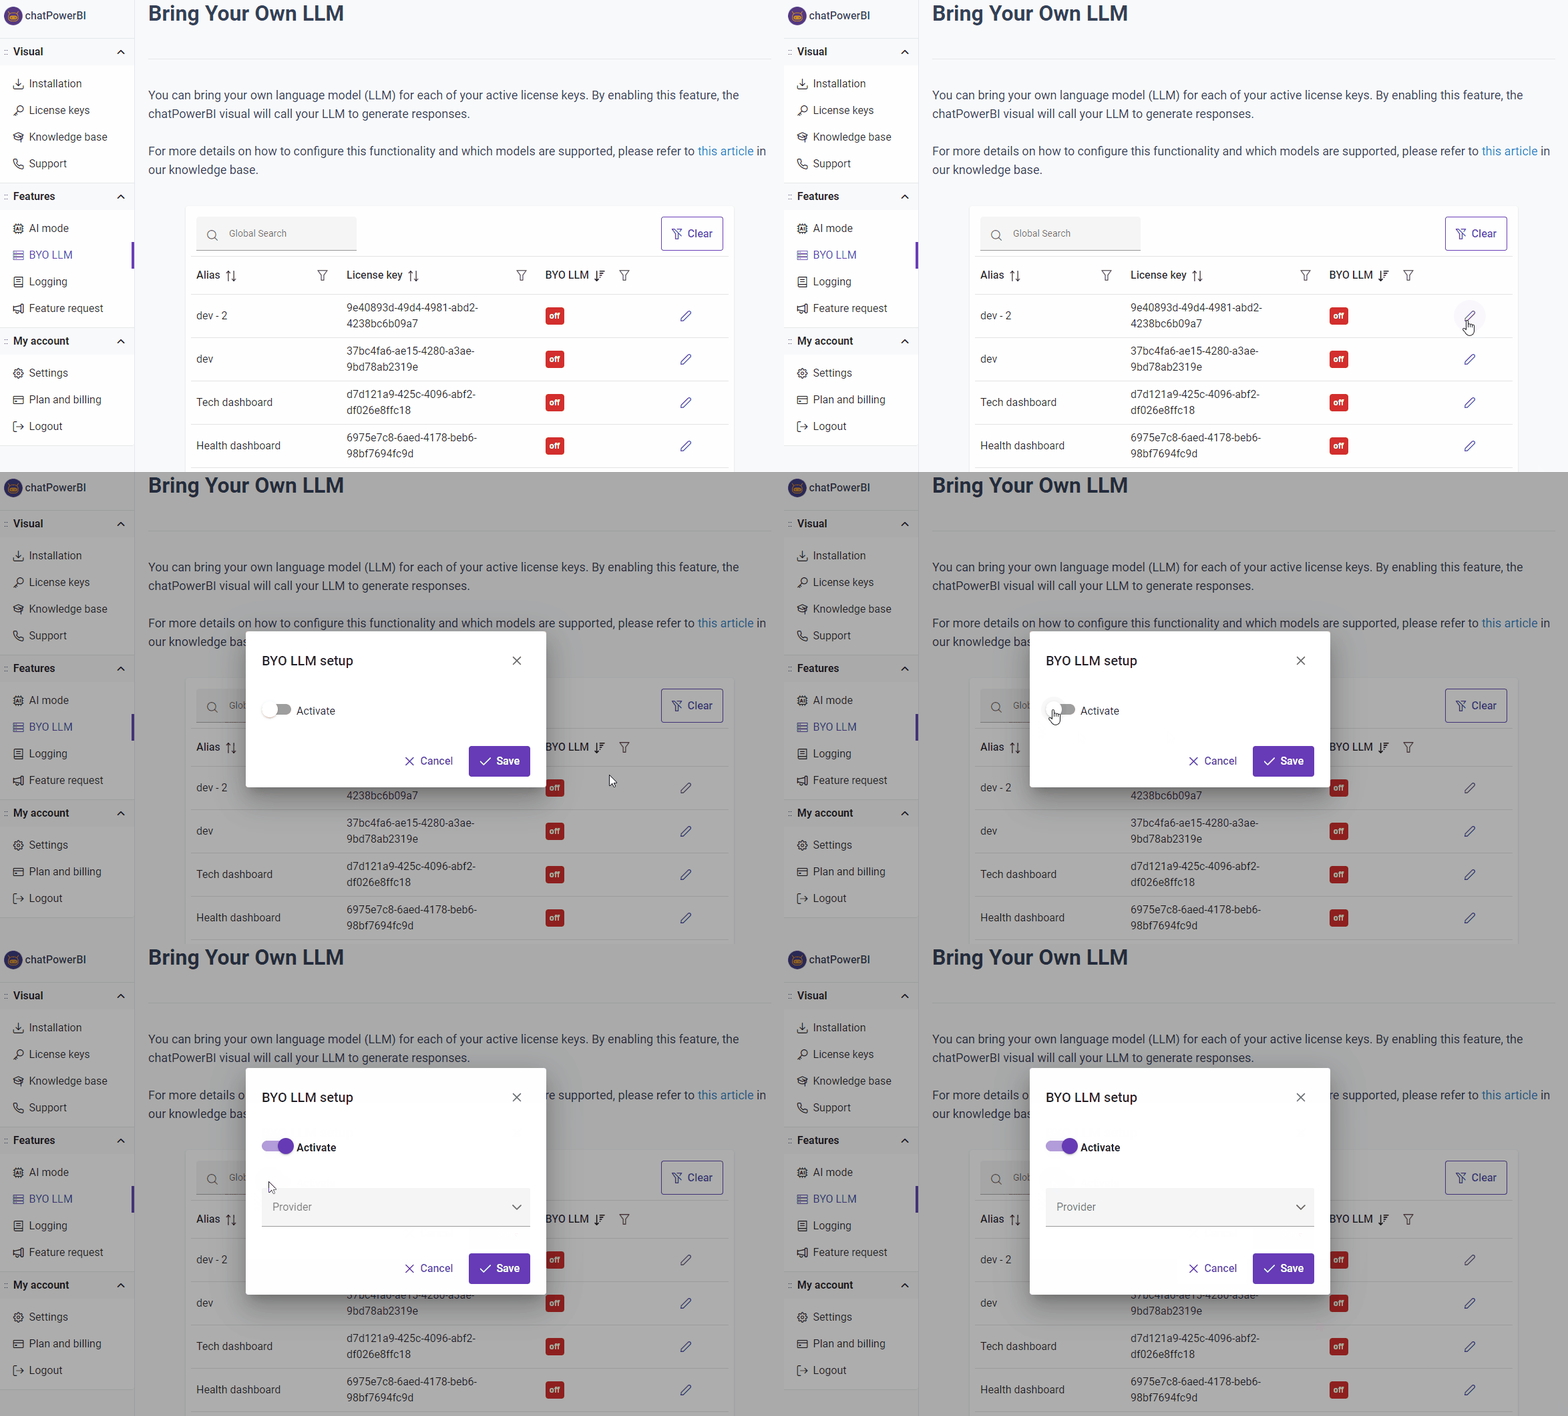
Now, select the provider. In the following sections, we will explain how to activate BYO LLM for the following providers: Anthropic, Azure, OpenAI or Custom deployment.
Depending on the provider, some settings need to be entered.
To configure Anthropic as the provider:
Step 1) After clicking the pencil icon for the desired license key, choose "Anthropic" provider.
Step 2) Select the desired model and click "Save". Wait for a minute for the changes to take effect. 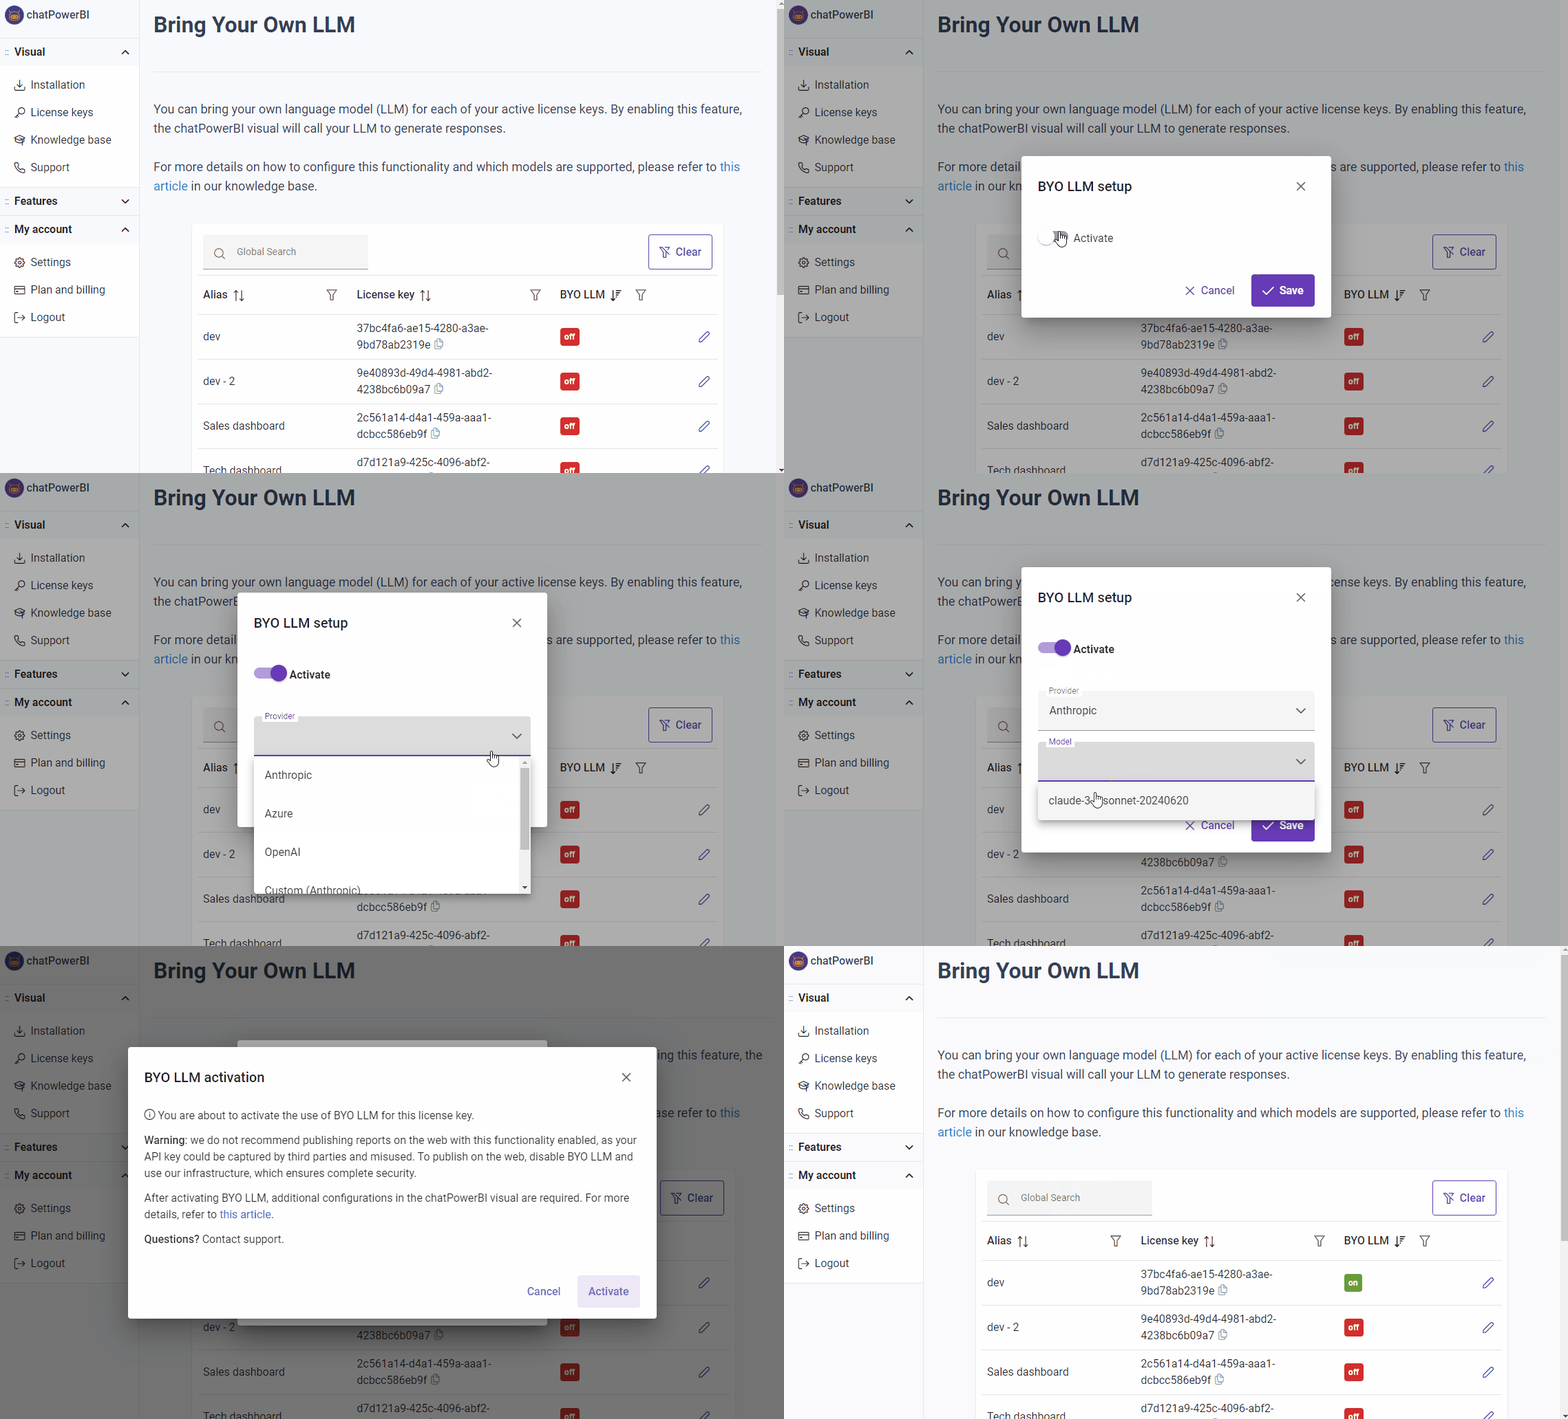
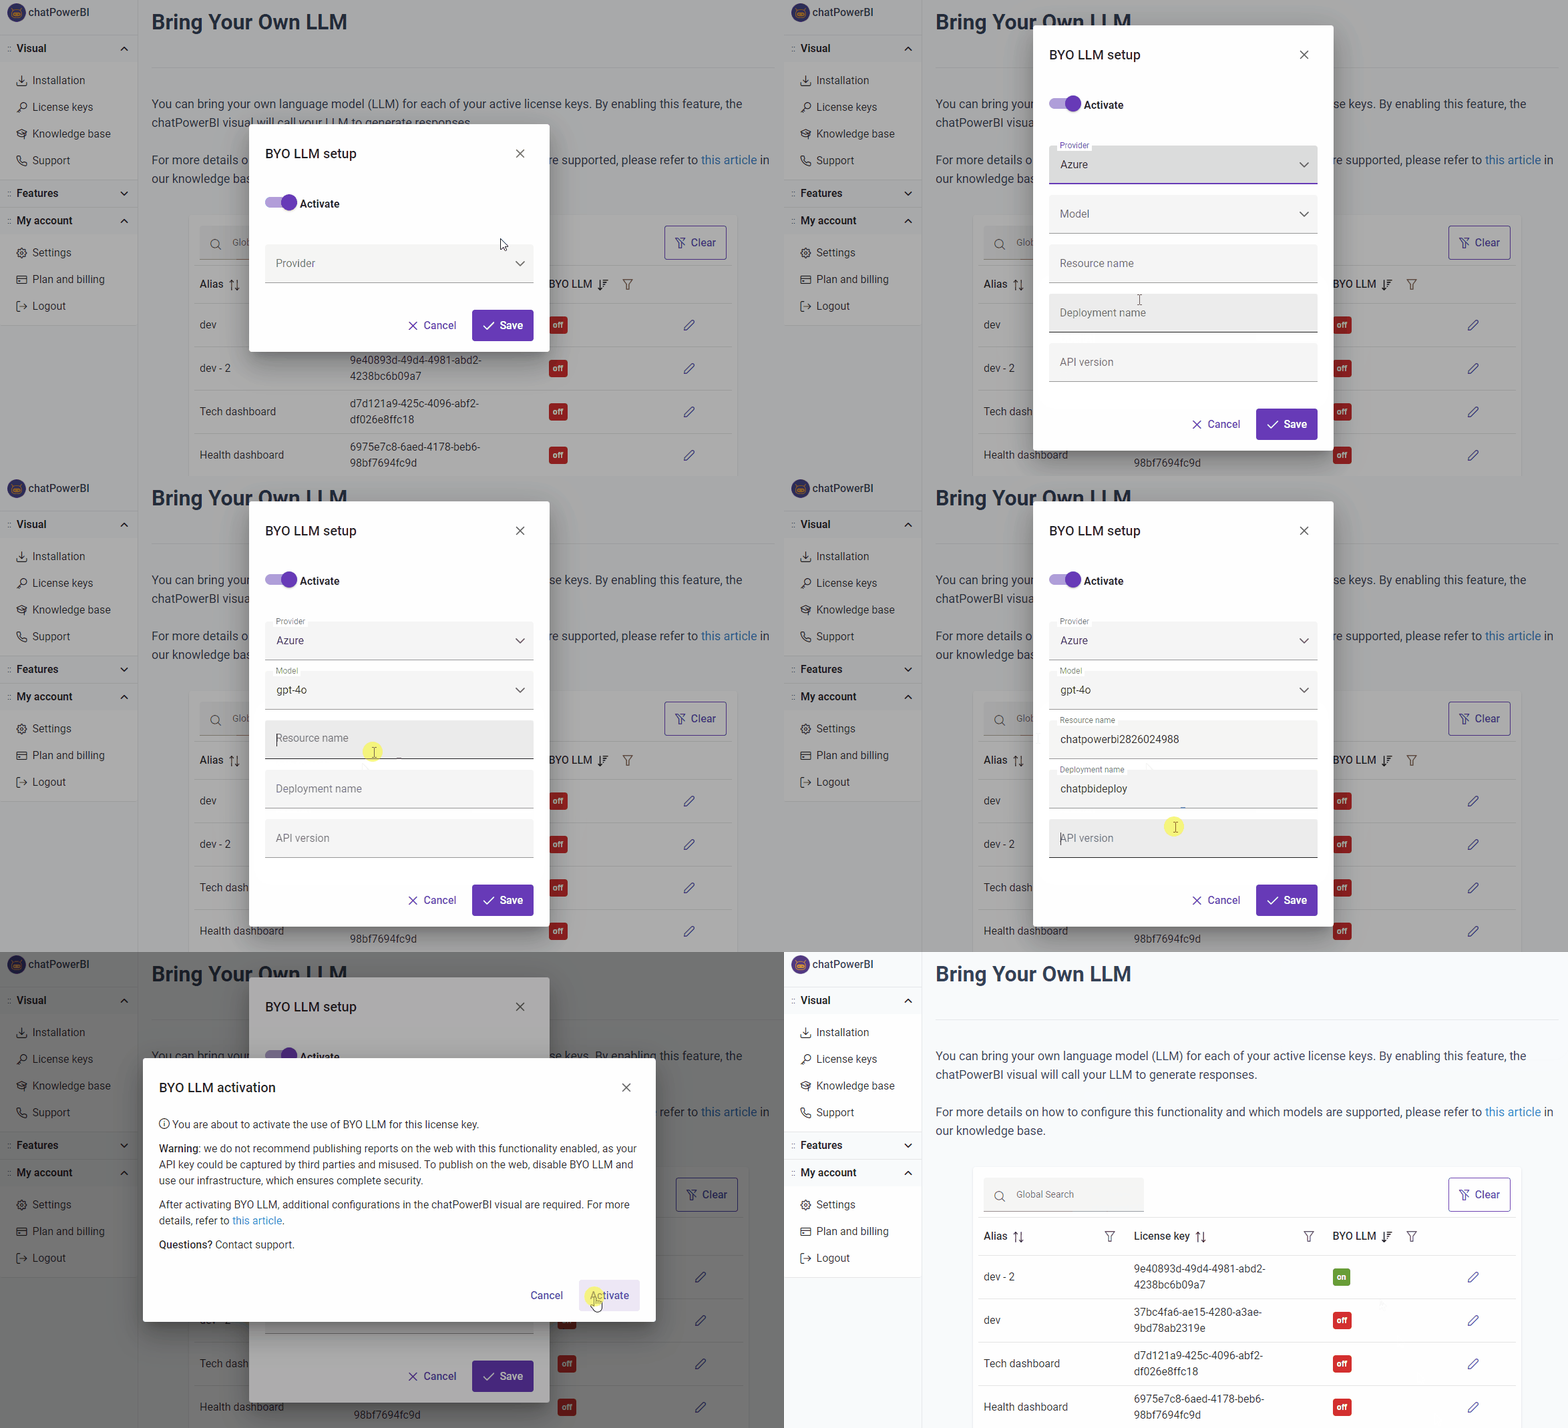
Step 1) After clicking the pencil icon for the desired license key, choose "Azure" provider.
Step 2) Get the following information (found in Azure AI Studio):
2. Model's endpoint URL
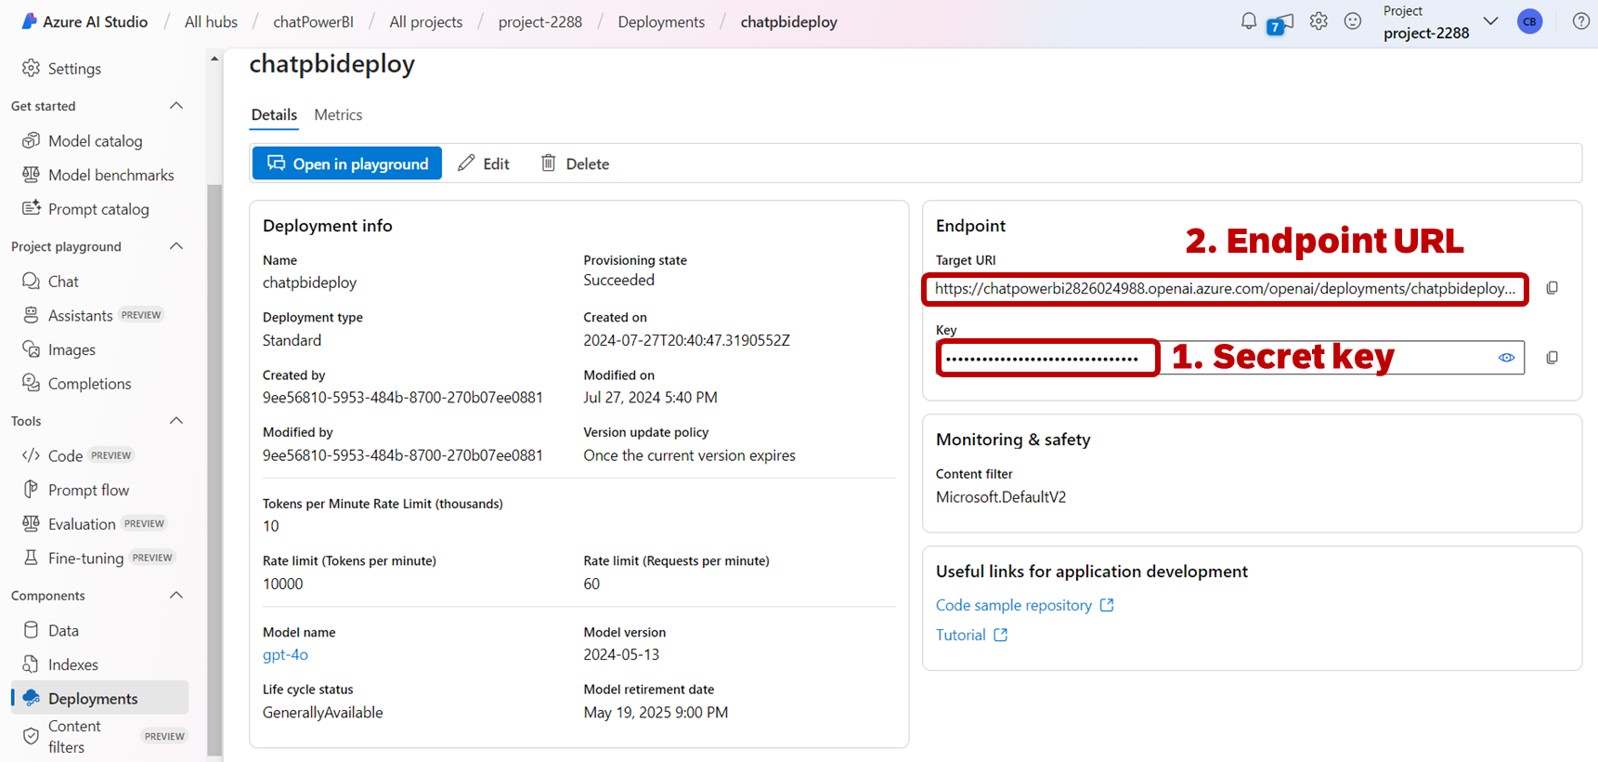
The endpoint URL provides:
- Deployment name
- API version
Enter these values and click "Save". If successful, a success message will appear and the BYO LLM status will be activated for the license key.
Wait for a minute for the changes to take effect.
To configure OpenAI as the provider:
Step 1) After clicking the pencil icon for the desired license key, choose "OpenAI" provider.
Step 2) Select the desired model and click "Save". Wait for a minute for the changes to take effect. 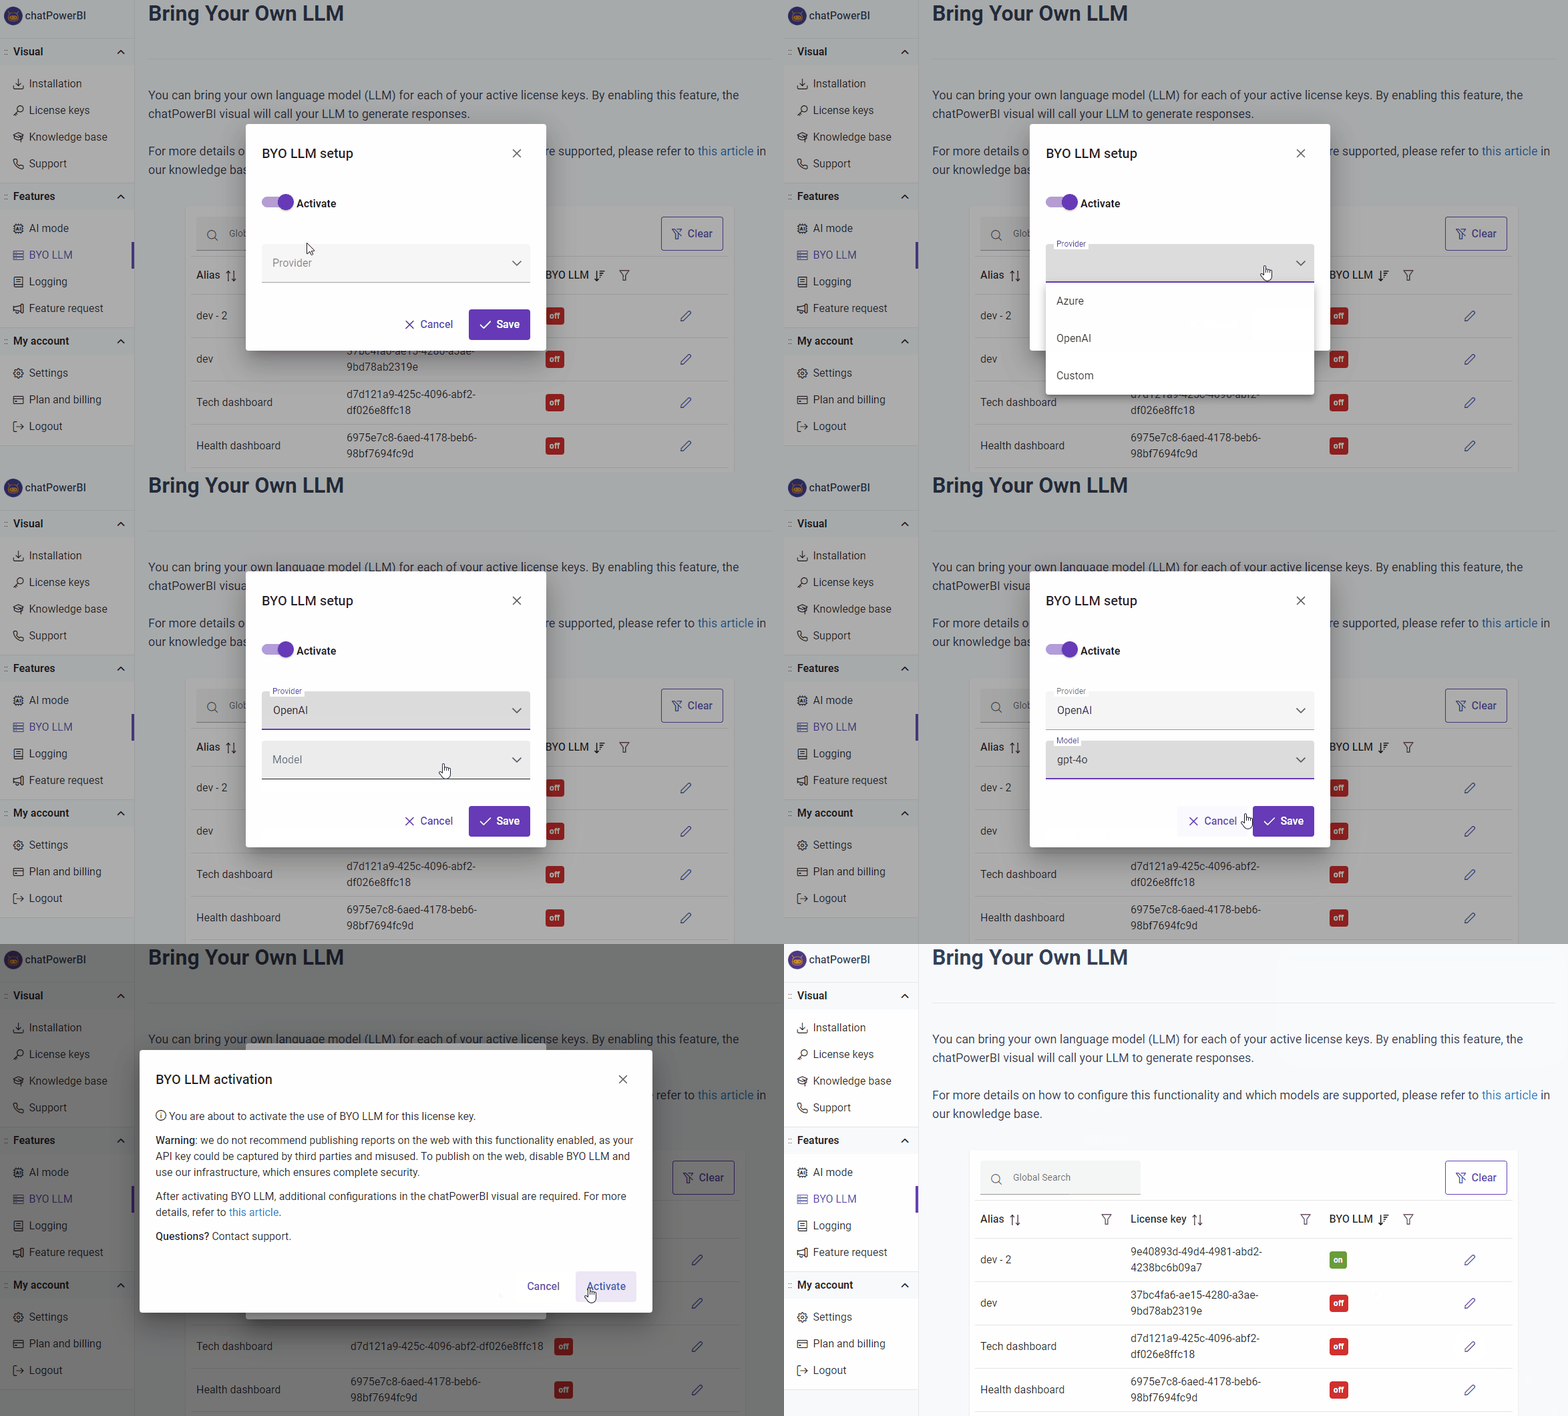
This provider should be used if you are using another form of deployment, for example, having an API gateway in front of your model's API.
To configure a custom provider:
Step 1) After clicking the pencil icon for the desired license key, choose "Custom-openai" or "Custom-anthropic" provider according to your deployment.
Step 2) Fill in the base URL for the endpoint and the model name.
Step 3) Include the necessary headers and indicate which header contains the API key.
For example, if you use Azure API Management (APIm) as a gateway for the LLM endpoint and the endpoint in APIm has the format:
https://api.mycompany.com/ia-models/azure/v1/openai/chat/completions?api-version=2023-03-15-preview
Passing the API key in the "api-key" header, you should use the URL in the base path and indicate in the headers that the header containing the API key is named "api-key".
After that, just click on Save. If everything goes well, a success message will appear.
Wait for a minute for the changes to take effect. 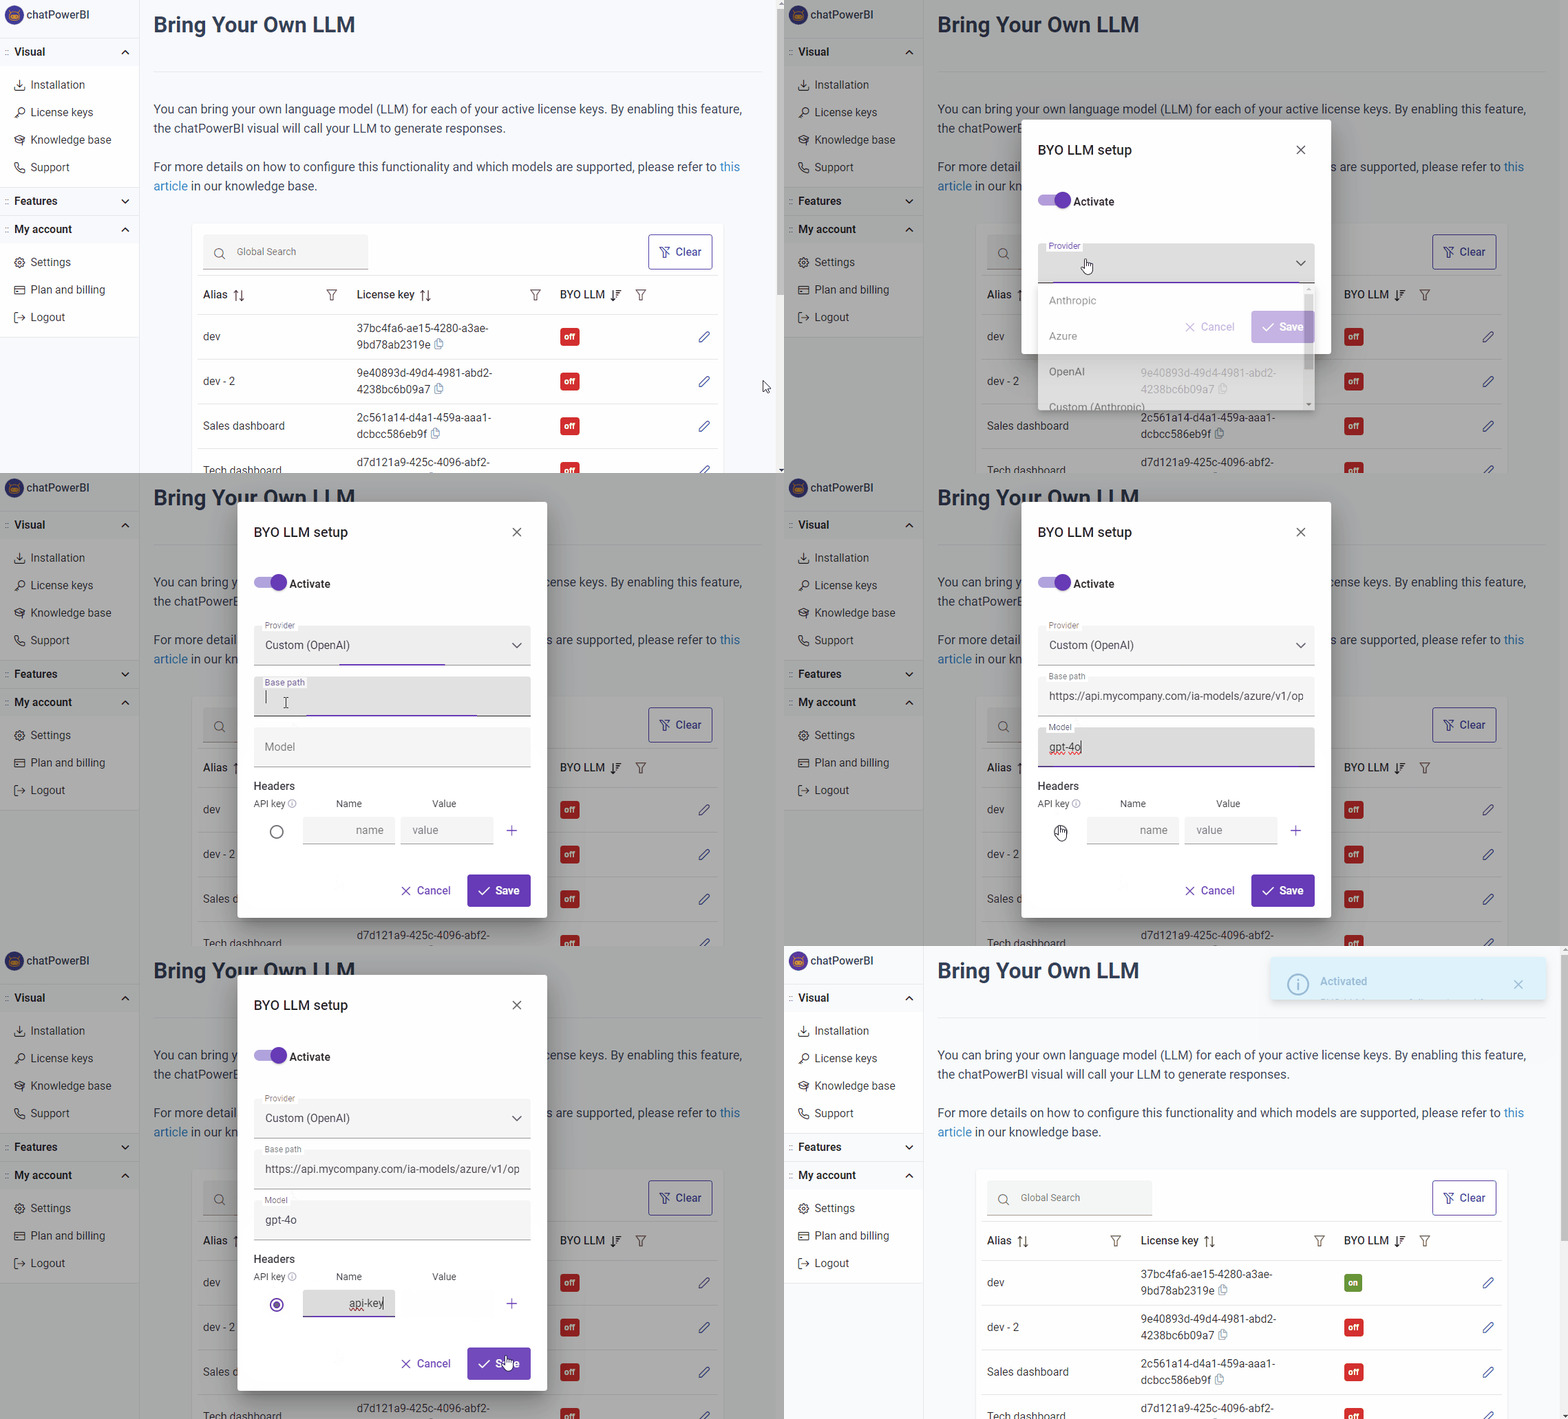
Finally, configure the chatPowerBI visual:
Step 1) Open your report and go to the chatPowerBI visual.
Step 2) In the "Format visual" tab: 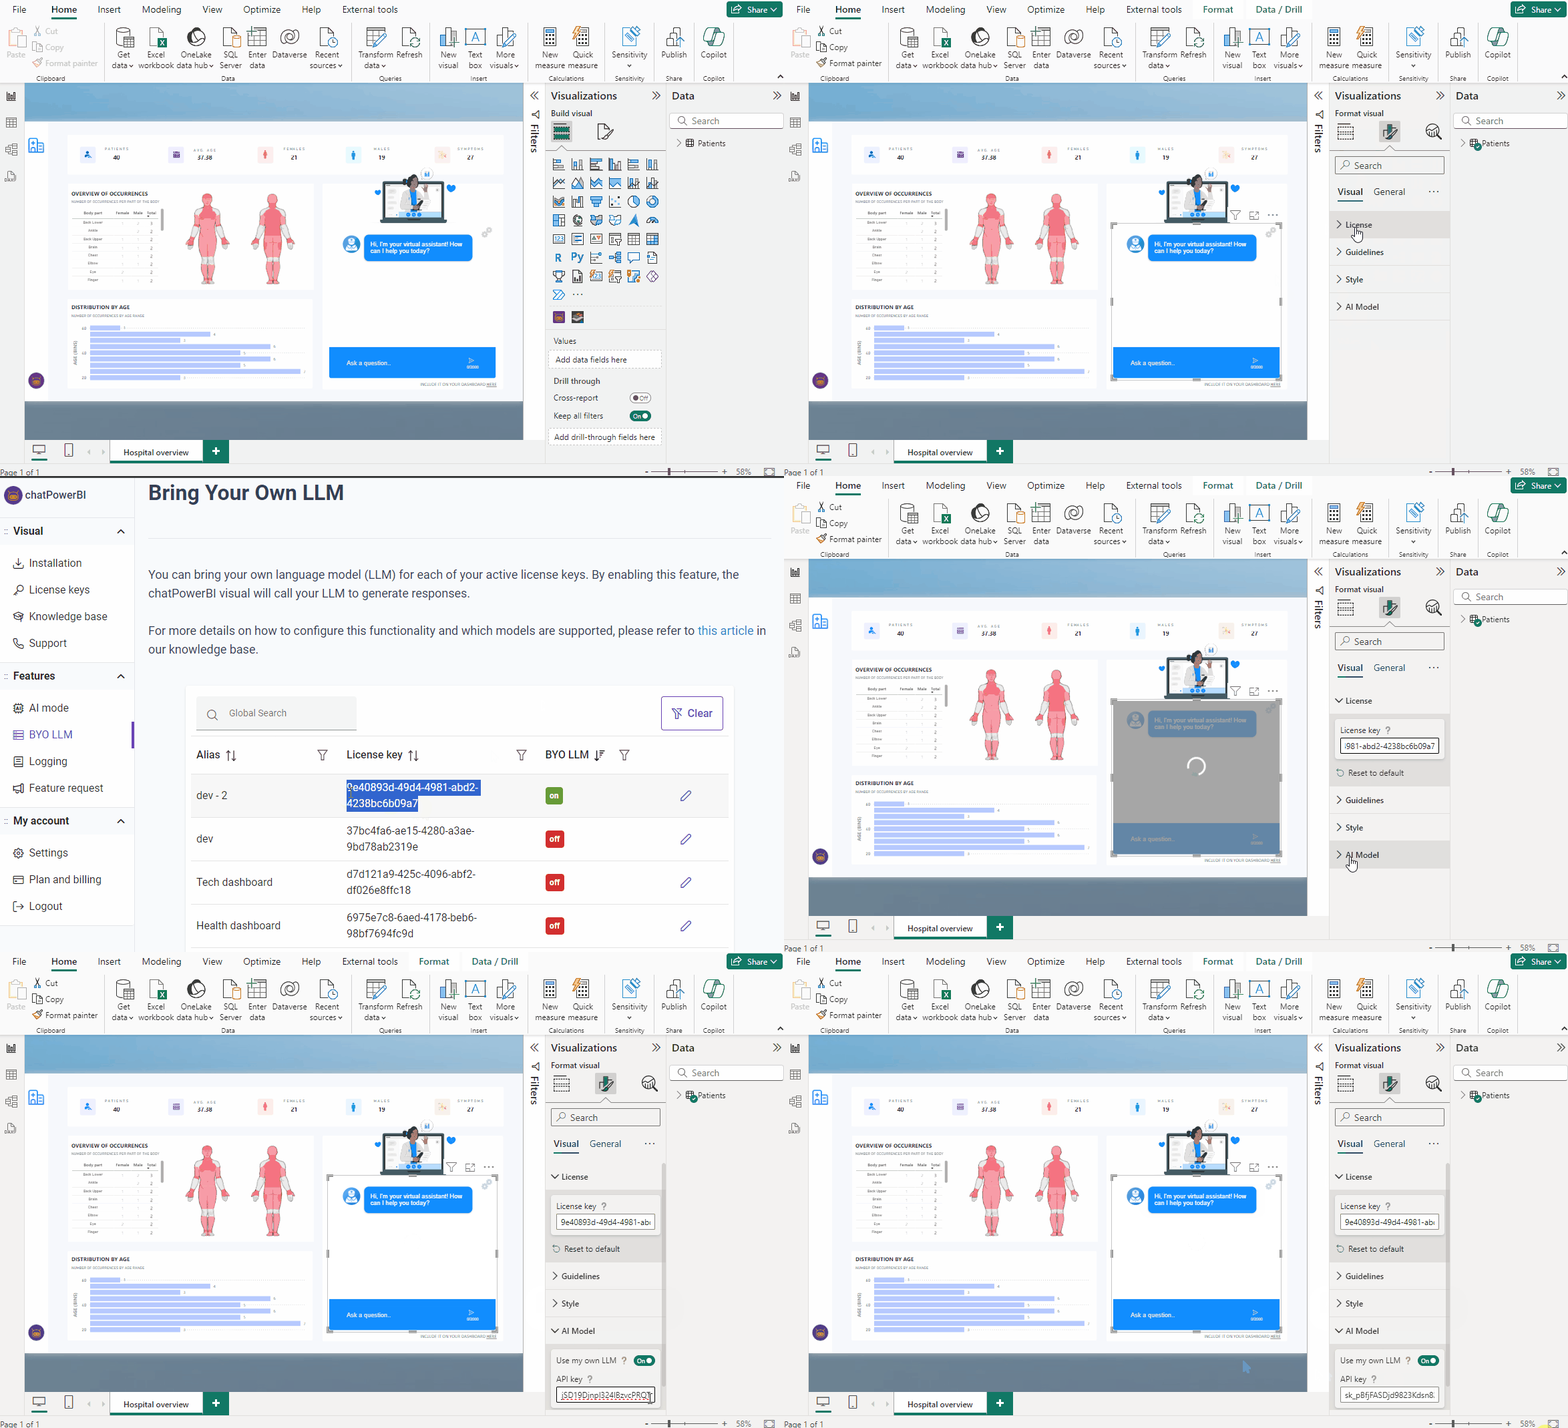
That's it! Your chatPowerBI visual is now using your LLM.