How to create predefined questions (Conversation starters)
Suggesting questions to your audience can enhance their experience when interacting with the AI assistant. Additionally, you can restrict the interaction to predefined questions only. In this article, we'll guide you through enabling and configuring the Conversation starters feature.
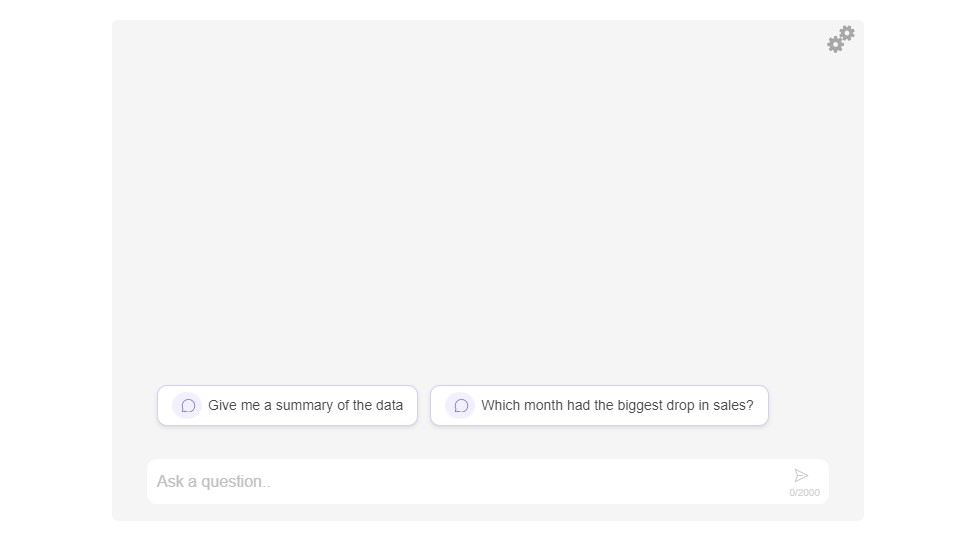
TABLE OF CONTENTS
- SETTING UP PREDEFINED QUESTIONS
- CHANGING THE DISPLAY MODE OF CONVERSATION STARTERS
- RESTRICTING INTERACTION TO PREDEFINED QUESTIONS ONLY
- CUSTOMIZING THE APPEARANCE OF CONVERSATION STARTERS
1. SETTING UP PREDEFINED QUESTIONS
To configure predefined questions in chatPowerBI, follow these steps: Step 1) Open the properties of chatPowerBI.
Step 2) Go to the Conversation starters section.
Step 3) In the Predefined questions field, enter each question separated by a semicolon (;).
Example
Give me a summary of the data; Which month had the biggest drop in sales?
Once set up, these questions will appear during the user's initial interaction with the chatPowerBI assistant.
2. CHANGING THE DISPLAY MODE OF CONVERSATION STARTERS
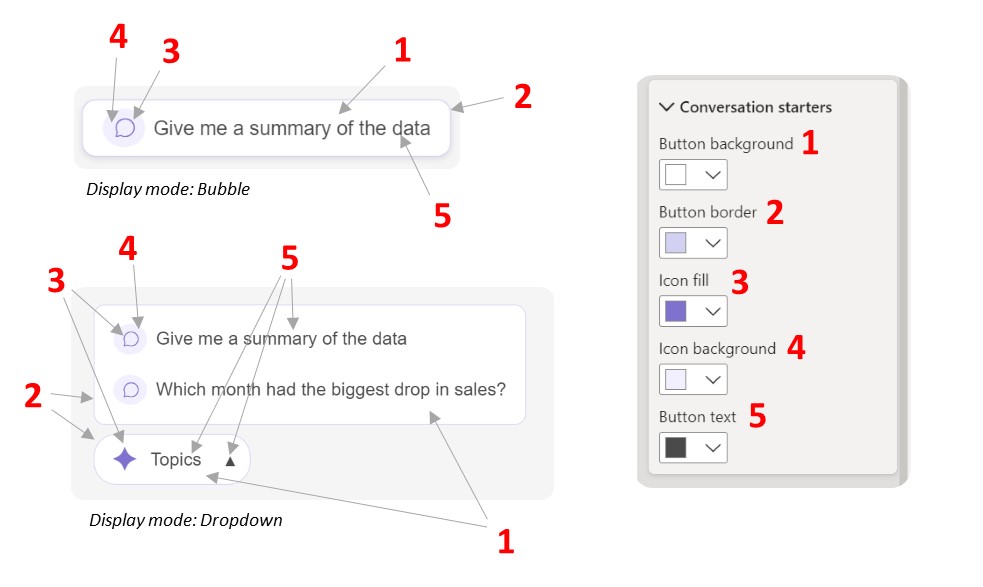
You can choose between two display modes for the predefined questions: - Bubbles: displays each question as a bubble. This works well for a small number of questions.
- Dropdown: displays the questions in a dropdown list, keeping the interface clean even with numerous questions.
To change the display mode:
Step 1) Go to the Conversation starters section in chatPowerBI properties.
Step 2) Find the Display mode property and select either Bubbles or Dropdown.
Note
If you select the Dropdown mode, you can customize the initial text displayed in the dropdown by modifying the Dropdown Label property.

3. RESTRICTING INTERACTION TO PREDEFINED QUESTIONS ONLY
If you want your audience to use only the predefined questions and prevent them from typing custom ones: Step 1) Navigate to the Conversation starters section in chatPowerBI properties.
Step 2) Enable the Restrict questions option by toggling the switch to On.
4. CUSTOMIZING THE APPEARANCE OF CONVERSATION STARTERS
To ensure the Conversation starters blend seamlessly with your dashboard design, you can customize their appearance: Step 1) Go to the Style section in chatPowerBI properties.
Step 2) Locate the Conversation starters group and explore the available style customization options.
For additional assistance, you can refer to this property-to-element mapping to understand how each style impacts the visual elements.
Turning data into powerful conversations: ChatGPT visual for Power BI.