In this guide, we'll explore how to activate and deactivate message logging in chatPowerBI. This feature offers valuable insights into user interactions with your assistant, enabling detailed analysis to optimize your data strategies and enhance the user experience.
- ACTIVATING AND DEACTIVATING LOGGING FOR A LICENSE KEY
- VIEWING STORED MESSAGES
- DELETING A MESSAGE
- EXPORTING THE MESSAGE LOG
- ACCESSING LOGS VIA REST API
You can activate logging for license keys with an active status. Access the user panel and navigate to the 'Message Logging' section.
In the 'License Keys' tab, you'll see all your active licenses and whether logging is enabled or disabled. To change the logging status for a license key, click on the corresponding edit icon and select the desired option ('on' to activate logging and 'off' to deactivate it).
Wait for a minute for the changes to take effect.

In the same section, select the 'Message History' tab. You'll see a table with all user conversations, including the date (in the 'Start Date' column), the user's IP, and their geographical location. You can filter the logs based on any column. In the top right corner of the table, there are buttons to clear filters and update the data.
To view the exchanged messages, click on the conversation bubble icon. A window will open displaying the stored dialogue. 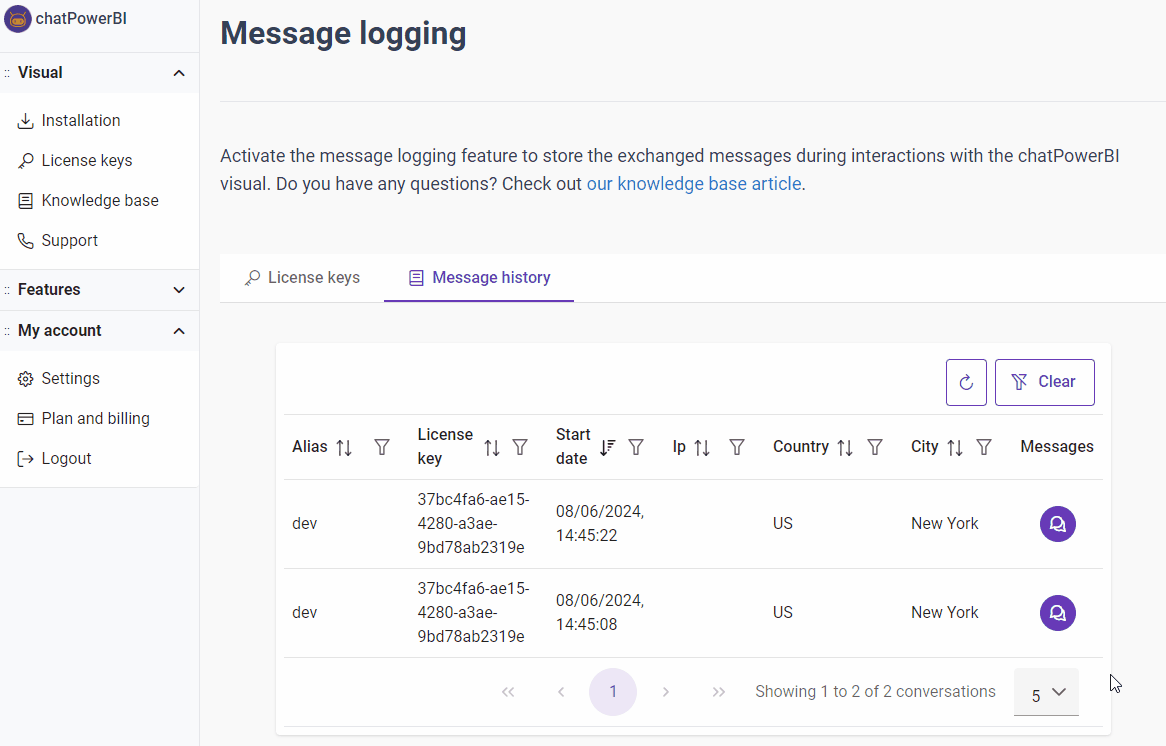
You can delete messages individually or in bulk, removing all visible messages on the current page. Below are the steps for each option:
Deleting an individual message
Step 1) Locate the message you want to delete.
Step 2) Click on the trash bin icon next to the message.
Step 3) A confirmation box will appear. Click "Yes" to confirm the deletion. 
Deleting all messages visible on the page
Step 1) Click on the trash bin icon at the top of the table.
Step 2) A confirmation box will appear. Click "Yes" to proceed. 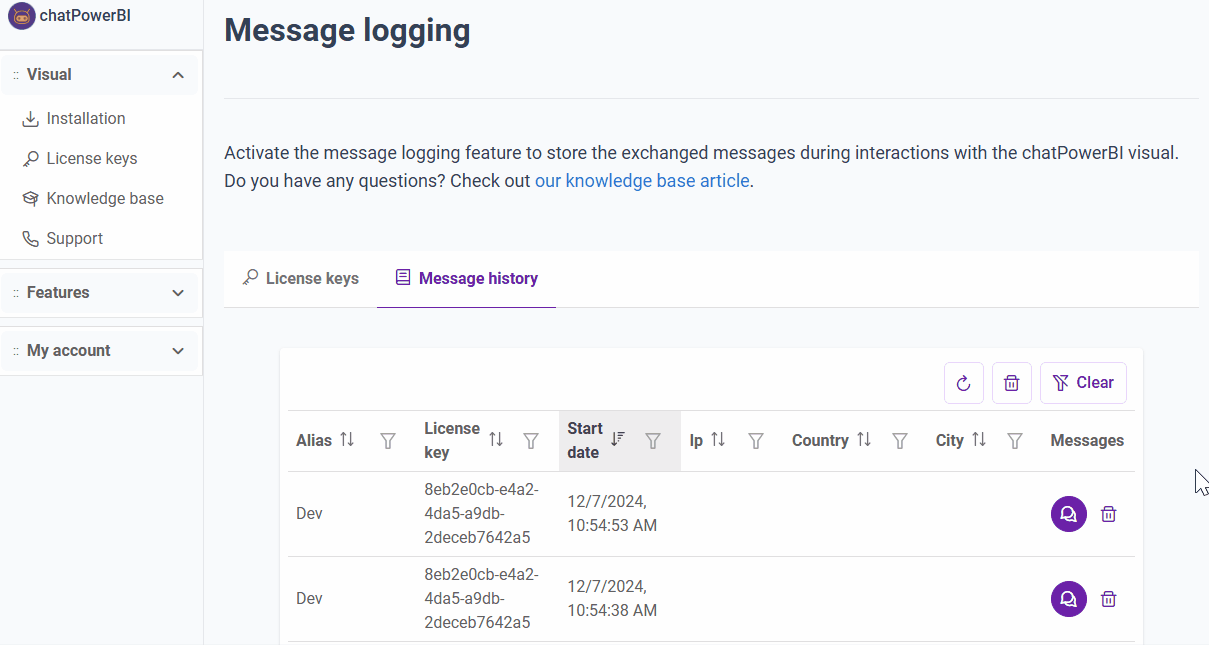
You can export the logs of messages visible on the current table page, making it easy to access for analysis or archiving purposes.
How to export
Step 1) Click the "Export" button located at the top of the table.
Step 2) The file will be automatically generated, and the download will start as soon as the process is complete. 
If you need to access message logs outside the user panel, we offer REST API access under the enterprise plan.
Generating API Key and Secret
To access the API, you must generate an API key and secret. Follow these steps:
Step 1) Go to the user panel and navigate to the Logging section.
Step 2) Click on the API Access tab.
Step 3) Click the New API Key button.
Step 4) A pop-up will appear asking you to select the licenses this API key will have access to. To grant access to all licenses, select All and click Create.
Step 5) Once created, a window will display the API key and its respective secret. Save the secret securely, as it cannot be retrieved later. If you forget the secret or it expires, click the refresh icon to generate a new one (invalidating the previous secret). 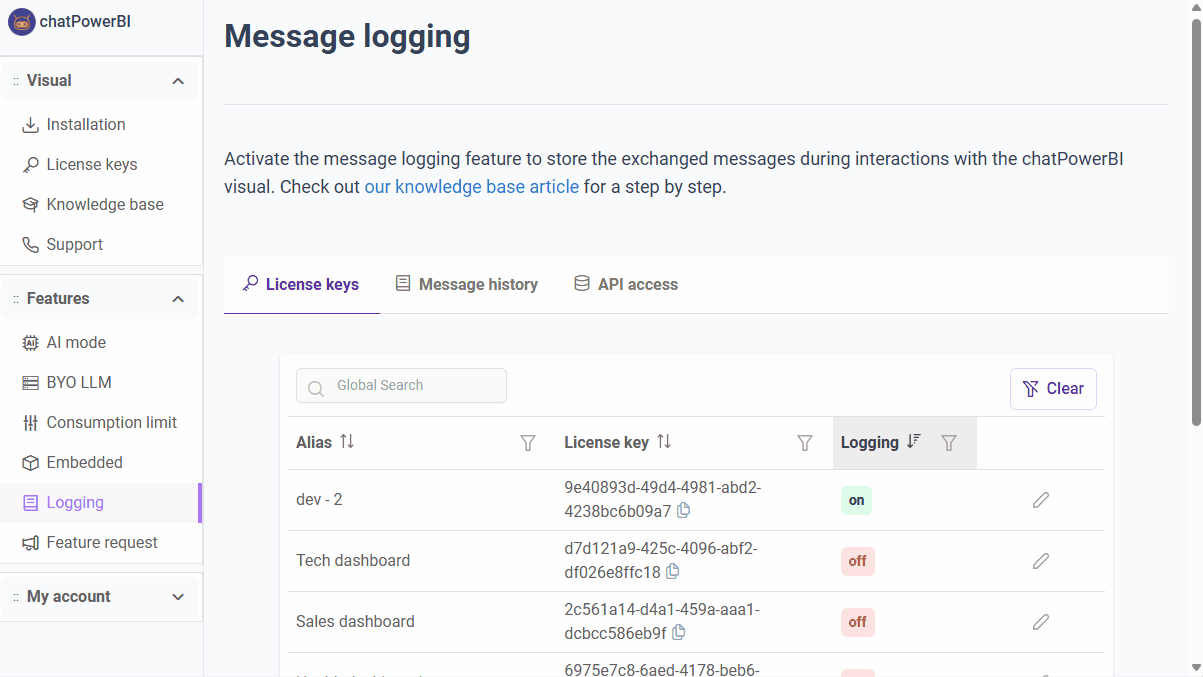
Accessing logs
You can access logs using either our Power BI template or an external tool.
1) Using the Power BI Template
Step 1) In the user panel, go to Logging > API Access and download the Power BI template.
Step 2) Open the template in Power BI Desktop and click transform data.
Step 3) Enter your API Key and Secret in the respective parameters.
Step 4) Click Close & Apply.
Step 5) If prompted with a Privacy Level window, select Organizational and click Save.
Step 6) In the authentication window, select Anonymous and click Connect.
Wait for the data to load. 
2) Connecting via an External Tool
To connect via an external tool, follow these steps:
Step 1) Obtain an Access Token.
Make a POST request to the authentication endpoint with your API key and secret:
The response will be a JSON object containing the access token:
Use the obtained token to make a GET request to retrieve logs:
The response is paginated, and logs are found under the data property. Pagination details are inside the pagination property:
You can filter and navigate logs using these query parameters:
Parameter | Type | Required | Default | Description |
|---|---|---|---|---|
| page | number | No | 1 | Page number for pagination |
| limit | number | No | 10 | Number of items per page (max: 100) |
| licenseKey | string | No | - | Filter by specific license key |
| startDate | date | No | - | Filter logs after this date |
| endDate | date | No | - | Filter logs before this date |
| country | string | No | - | Filter by country (partial match supported) |
| city | string | No | - | Filter by city (partial match supported) |
| search | string | No | - | Search across multiple fields (chatId, IP, country, city, messages) |
Examples
Filtered Request with Pagination
Search with Multiple Filters