How to update the chatPowerBI visual?
This article assumes that you've already installed the chatPowerBI visual in your Power BI report and now want to update it. If you haven't installed the visual yet, we recommend reading the article "How to install the chatPowerBI visual?".
TABLE OF CONTENTS
1. DOWNLOAD THE LATEST VERSION
First, you need to have an account (you can create one for free). Once logged in, navigate to the user panel and click on "installation". On this page, you can download the latest version of the visual. 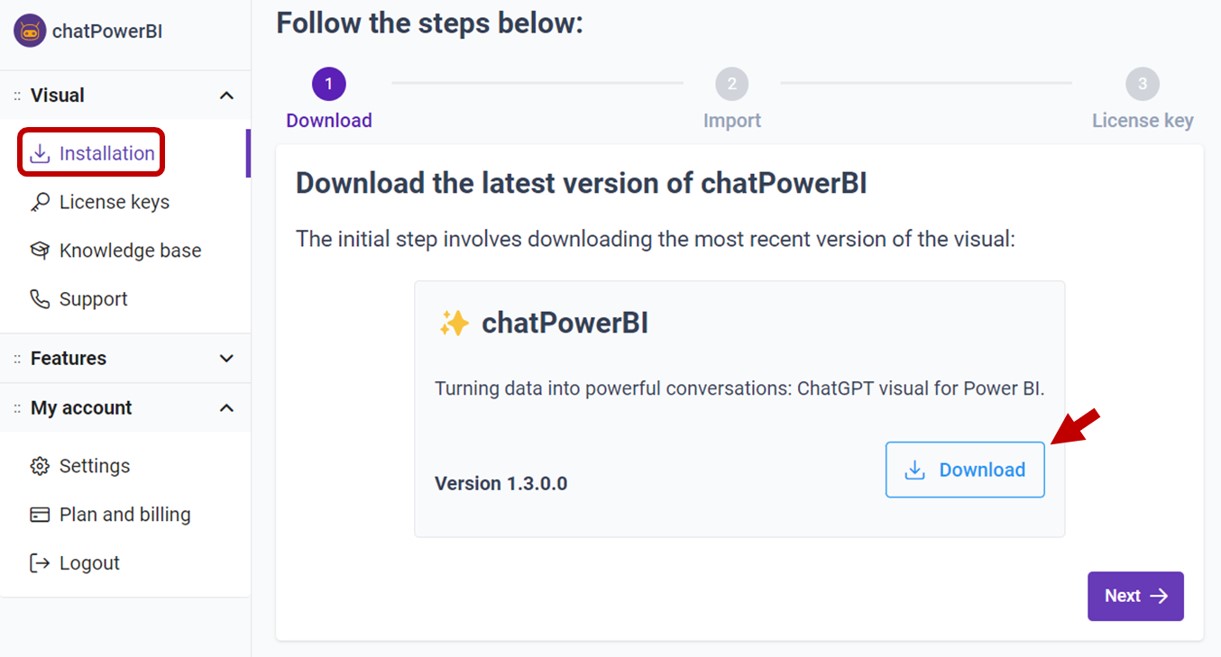
2. IMPORT THE VISUAL INTO POWER BI
1. Open your report in Power BI Desktop or Power BI Service.
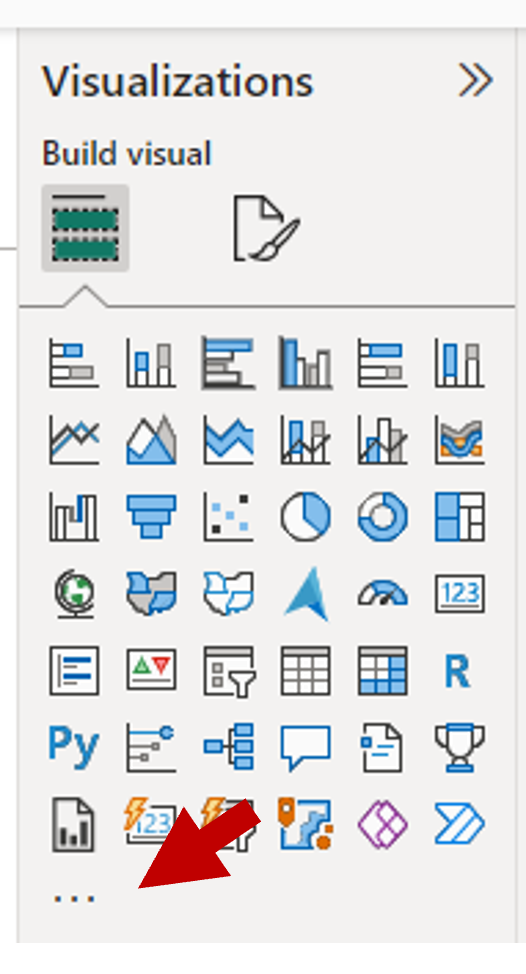
2. Select the ellipsis from the Visualizations pane.
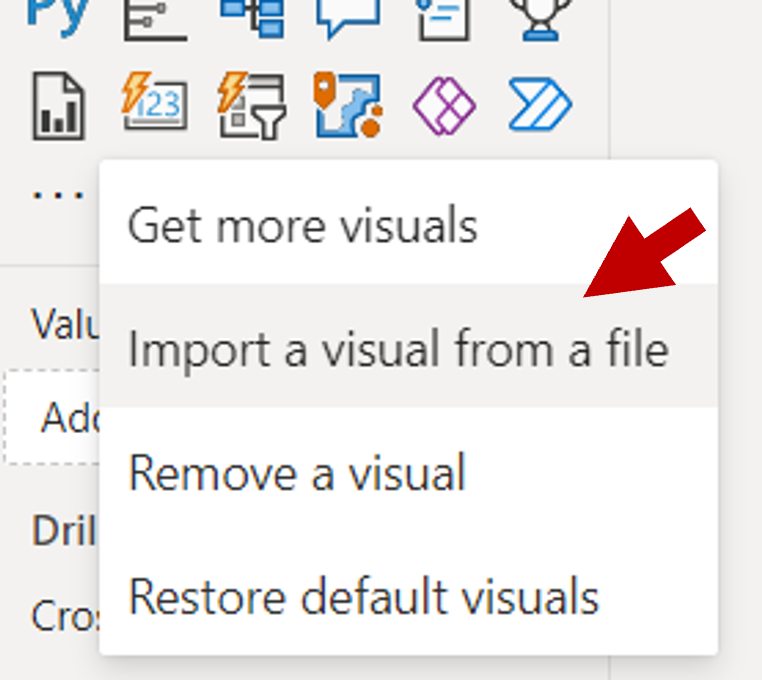
3. Select Import a visual from a file from the menu.
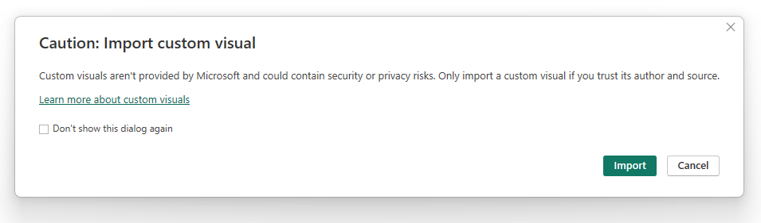
4. If you get a message cautioning you about importing custom files, select Import.
5. Navigate to the folder where you saved the downloaded visual.
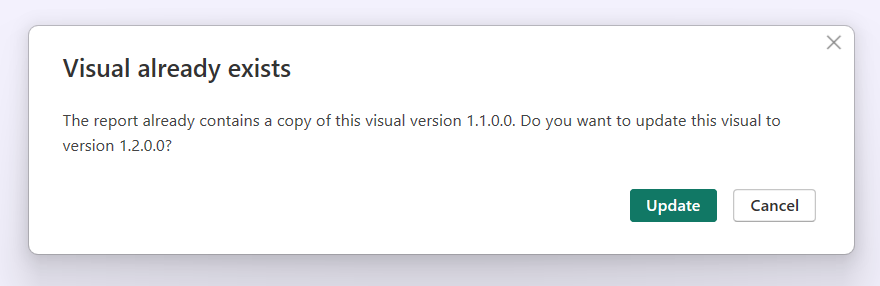
6. When the visual has successfully imported, select Update.
After importing the new version, remember to save your Power BI report and restart Power BI Desktop to apply the updates.
Turning data into powerful conversations: ChatGPT visual for Power BI.